실습을 mongoose로 하기 때문에 mongoose에 대해 조금 알아둬야 합니다.
mongoose를 통해 express와 mongoDB 연동하기
몽고가 성공적으로 설치되었음을 확인했다면 우리가 사용하고 있는 Javascript로 사용할 수 있게 mongoDB를 연결해보자. mongoDB는 다른 언어(C++)로 구성되어 있어 javascript와의 adapter를 통한 연결 작업이 필..
darrengwon.tistory.com
몽고 DB에 계정을 생성한 후 cluster를 만들자. 만드는데 5분 정도 걸린다

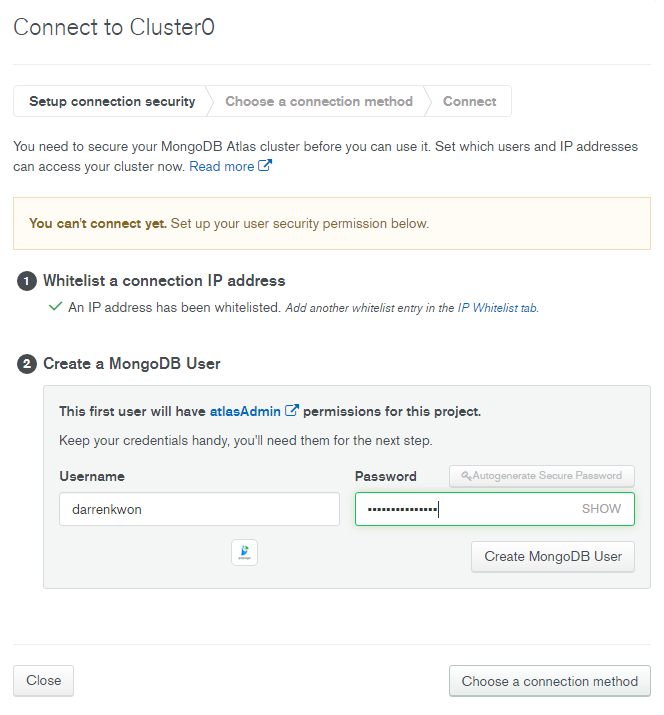
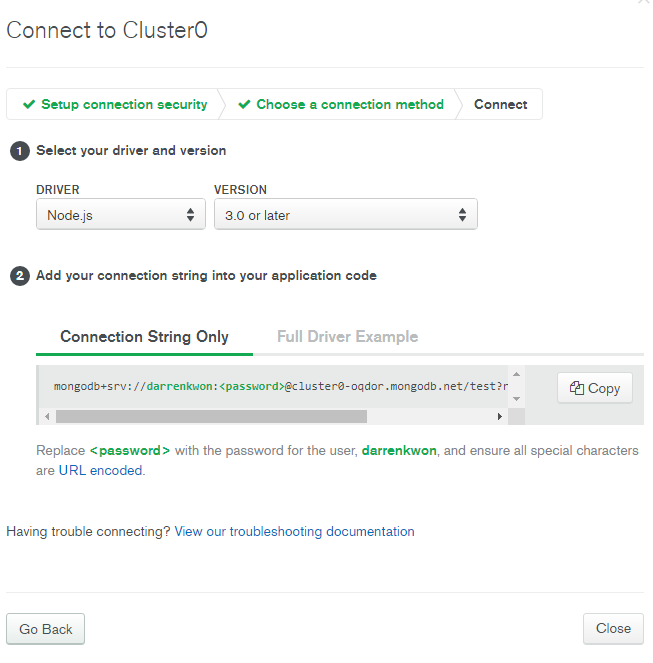
connect를 눌러 유저를 생성해주자. 후에 연결 방법은 [Connect your application]으로 하자. 지금은 Node 서버에 mongoDB를 연결할 것이기 때문이다.

후에는 cluter 연결 driver를 선택하고, Connection String을 저장해둡니다. 연결 시에 필요합니다.
간단히 실습해보기 위해서 Node 환경에서 mongoose를 이용하여 mongoDB에 연결해보겠습니다.
mongoose.connect
(https://mongoosejs.com/docs/api.html#mongoose_Mongoose-connect)
각 옵션이 무슨 역할을 하는지 사용한 부분만 가져와 보았다.
[options.useNewUrlParser=false] «Boolean»
False by default. Set to true to opt into the MongoDB driver's new URL parser logic.
[options.useUnifiedTopology=false] «Boolean»
False by default. Set to true to opt into the MongoDB driver's replica set and sharded cluster monitoring engine.
[options.useCreateIndex=true] «Boolean»
Mongoose-specific option. If true, this connection will use createIndex() instead of ensureIndex() for automatic index builds via Model.init().
[options.useFindAndModify=true] «Boolean»
True by default. Set to false to make findOneAndUpdate() and findOneAndRemove() use native findOneAndUpdate() rather than findAndModify().
=> true로 설정했으니 findOneAndUpdate() and findOneAndRemove()를 사용해야 한다.
또, 어느 순간부터 db 이름을 못잡는데 간단히 connection 부분에서 dbname을 설정해줌으로써 해결할 수 있습니다.
const express = require("express");
const dotenv = require("dotenv").config();
const { User } = require("./models/User");

const app = express();
const mongoose = require("mongoose");

const port = process.env.PORT || 3000;

// middleware
// application/json
app.use(express.json());
// application/x-www-form-urlencoded
app.use(express.urlencoded({ extended: false }));

// db connect
mongoose
  .connect(process.env.mongoURL, {
    useNewUrlParser: true,
    useUnifiedTopology: true,
    useCreateIndex: true,
    useFindAndModify: false,
    dbName: "userInfo" // 이 이름으로 db가 생성됩니다.
  })
  .then(() => console.log(`mongoDB connected`))
  .catch((err) => console.error(err));

// router
app.get("/", (req, res) => res.send("Hello World!"));

app.listen(port, () =>
  console.log(`Example app listening at http://localhost:${port}`)
);
스키마와 모델 정의
const mongoose = require("mongoose");

const userSchema = mongoose.Schema({
  name: {
    type: String,
    maxLength: 50,
  },
  email: {
    type: String,
    // trim은 문자열에서 스페이스를 제거합니다.
    trim: true,
    unique: true,
  },
  password: {
    type: String,
    minlength: 5,
  },
  lastname: {
    type: String,
    maxLength: 50,
  },
  role: {
    type: Number,
    default: 0,
  },
  image: String,
  token: String,
  tokenExp: {
    type: Number,
  },
});

// 모델의 이름과 스키마를 이용해 모델의 정의함.
const User = mongoose.model("User", userSchema);

module.exports = { User };
모델 이식 후 로직 처리하기
const { User } = require("./models/User");


app.post("/register", (req, res) => {

  // User 데이터 모델과 연결된 객체 생성 후 req.body 삽입
  const user = new User(req.body);

  // save 메서드를 통해 원격 저장소에 데이터 저장.
  user.save((err, userInfo) => {
    // 에러면 false 반환
    if (err) return res.json({ suceess: false, err });
    // 성공적이면 200 상태 코드 날리고 true 값 돌려주기
    return res.status(200).json({ suceess: true });
  });
});
insomnima를 통해 post를 날린 후 성공적으로 처리가 되었고, 원격 저장소에도 저장이 되었습니다.
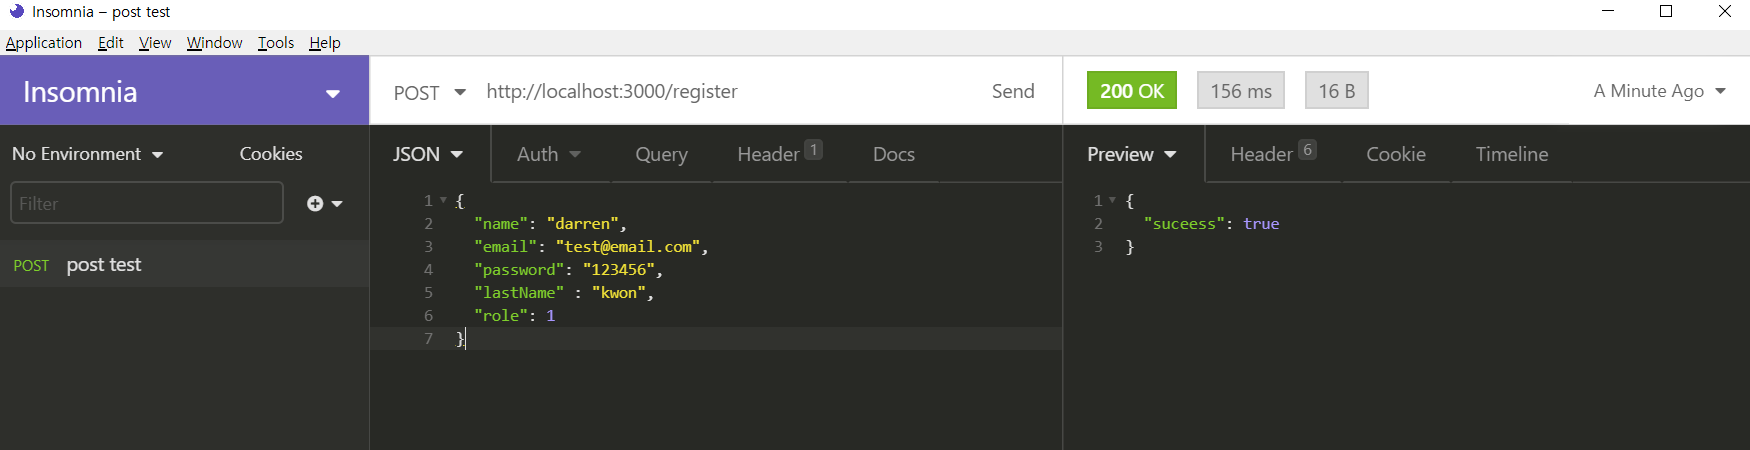

이를 이용해 간단한 회원가입을 작성해보았습니다.
// POST /register
app.post("/register", (req, res) => {
  // 회원 정보 form을 req.body에서 추출한 후 DB와 연계합니다.
  console.log(req.body);

  // 비밀번호를 암호화 한 후 DB에 저장합니다.
  bcrypt.genSalt(10, (error, salt) => {
    if (error) {
      return res
        .status(500)
        .json({ error: "비밀번호 salt 생성에 실패했습니다" });
    }
    bcrypt.hash(req.body.password, salt, async (error, hash) => {
      if (error) {
        return res
          .status(500)
          .json({ error: "비밀번호 hash화에 실패했습니다" });
      }
      req.body.password = hash;
      console.log(req.body.password);

      const user = new User(req.body);
      // 저장합니다.
      user.save((err, userInfo) => {
        if (err) {
          // 이후 err는 좀 더 세분화해서 처리합니다. 400, 403 etc...
          return res.json({ success: false, err });
        }
        return res.status(200).json({ success: true });
      });
    });
  });
});
'DB, ORM > 🍃mongoose, pymongo' 카테고리의 다른 글
| 검색을 빠르게 해주는 mongoDB 인덱스 (pymongo로 작업) (0) | 2020.06.09 |
|---|---|
| pymongo/mongoose 쿼리 작성하기 (0) | 2020.06.09 |
| pymongo 라이브러리를 통해 python으로 mongodb 조작하기 (0) | 2020.06.08 |
| mongoose 미들웨어, Instance methods, Statics 사용하기 (0) | 2020.05.28 |
| mongoose를 통해 express와 mongoDB 연동하기 (0) | 2020.03.27 |
