테스트의 순서는 대체로 다음과 같다.
@testing-library/react에 있는 render로 dom 그리고
@testing-library/user-event로 이벤트를 발생시키고
@testing-library/jest-dom/extend-expect로 matcher를 통해서 테스트를 한후
@testing-library/react에 있는 cleanup으로 rennder된 dom tree를 지워준다.
testing library?
https://testing-library.com/docs/react-testing-library/intro
React Testing Library | Testing Library
React Testing Library builds on top of DOM Testing Library by adding
testing-library.com
우선 RTL가 속한 큰 프로젝트를 먼저 소개하는 것이 맞겠다. @testing-library에 속한 패키지들은 유저의 행동에 기반한 테스팅을 도와주는 패키지들이다. npm 상에서 @testing-library/* 꼴로 관리되고 있다.
관련 프로젝트 코드들은 https://github.com/testing-library 에서 확인할 수 있다.
그리고 이 프로젝트들은, 특정 라이브러리나 프레임워크에서 사용할 수 있는 메인 라이브러리와
이 메인 프레임웤을 보조하는 다른 패키지들이 존재한다.
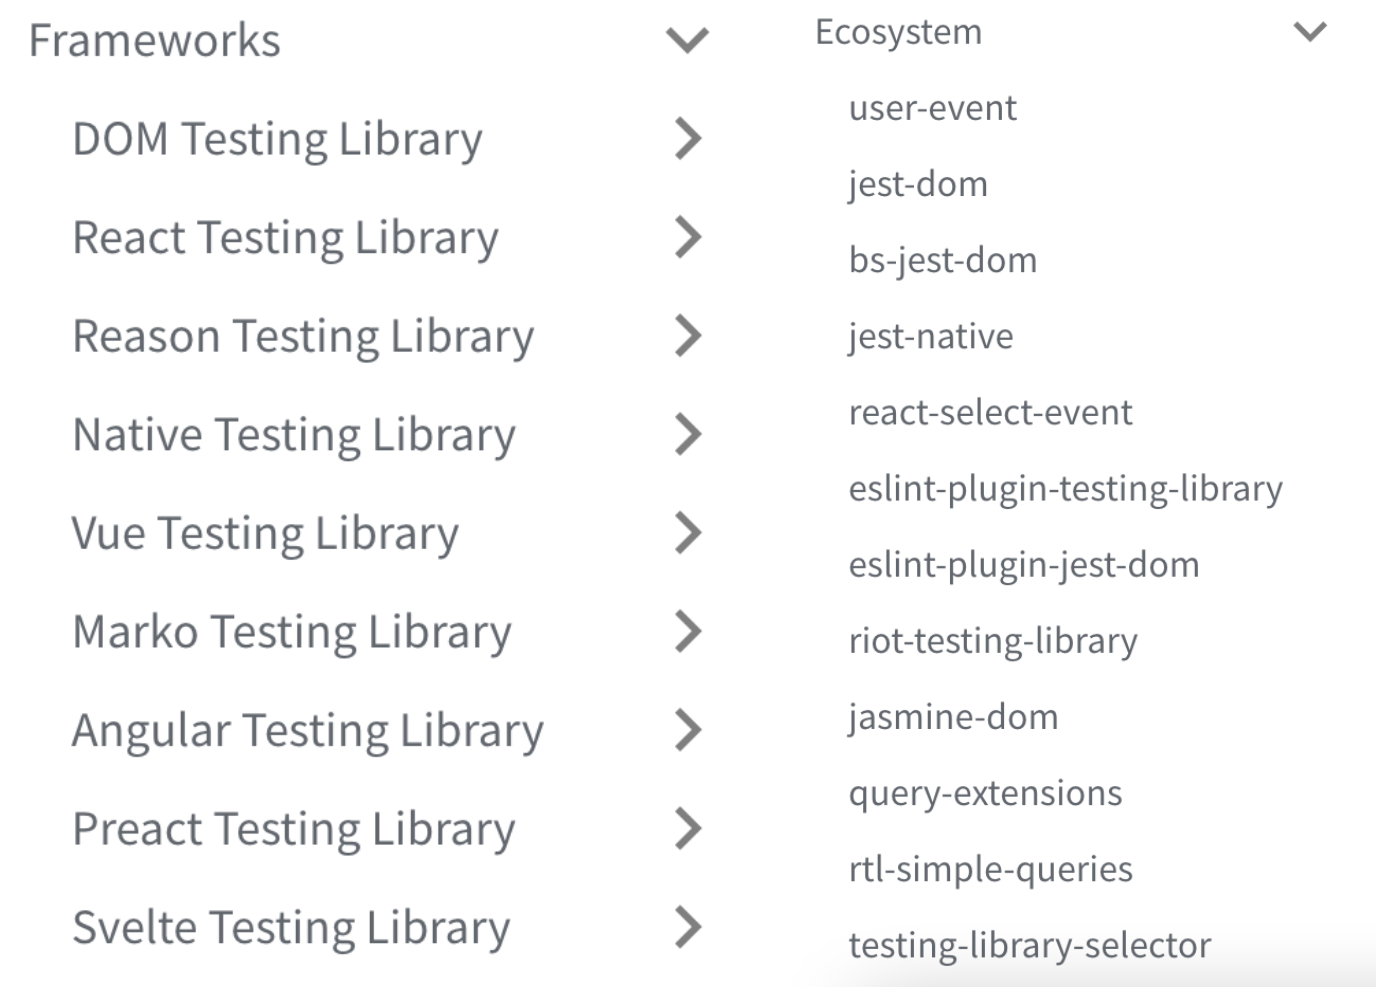
위 많고 많은 패키지 중 우리는 React를 사용할 것이니, React Testing Library를 기본적으로 사용할 것이고 추가적으로 user-event, jest-dom을 사용할 것이다. eslint를 사용 중이라면 eslint-plugin-testing-library와 eslint-plugin-jest-dom을 사용해야 할 것이다.
CRA로 프로젝트 시작 시에 기본적으로 최소한으로 사용해야 할 패키지들은 이미 설치가 되어 있다.
프로젝트 구성에 따라 추가적인 보조 패키지를 설치하는 것은 자율적으로 하자. 우리는 일단 아래 3개를 쓸 것이다.
(* 추가적으로, @testing-library의 패키지들은 jest에 의존하고 있으므로 jest를 devdependencies로 설치해줘야 합니다. 다만 CRA에서는 이미 내부적으로 jest가 설치되어 있어서 굳이 설치하면 redundant하다고 에러를 냅니다.)
@testing-library/jest-dom : https://github.com/testing-library/jest-dom
ㄴ DOM node를 테스트하기 위한 커스텀 jest matcher를 제공. 따라서 React 뿐만 아니라 vue, svelte 등 DOM 다루는 프론트엔드 프레임웤에서는 다들 사용하겠죠?
@testing-library/react : https://github.com/testing-library/react-testing-library
ㄴ render, fireEvent, screen 등 React를 테스트하는데 필요한 메서드들을 제공.
@testing-library/user-event : https://github.com/testing-library/user-event
ㄴ click, upload 등 유저 이벤트 제공합니다. 역시나 여타 프론트엔드 프레임웤에서는 다들 사용합니다.
"dependencies": {
  "@testing-library/jest-dom": "^5.11.4",
  "@testing-library/react": "^11.1.0",
  "@testing-library/user-event": "^12.1.10",
  ...
}
testing env configuring
CRA 환경에서의 구성을 전제로 합니다. 아래 문서에 자세히 나온 편입니다.
https://create-react-app.dev/docs/running-tests#initializing-test-environment
* 참고로 CRA 환경에서는 jest 명령어를 직접 사용하시지 말고, 미리 구성된 react-script jest 를 사용해야 합니다.
괜히 babel이랑 jest 만지작대지 마세요.. ㅜ
src/setupTests.js는 별다른 조작 없이 그냥 가만히 두시면 됩니다. CRA에서 이미 다 해줬습니다.
// dom을 위한 jest mather
import "@testing-library/jest-dom/extend-expect";

// 이거 ㄴㄴ 에러남. 그냥 @testing-library/react의 cleanup 빼다 쓰세요
// import "@react-testing-library/cleanup-after-each";
반면, 커스텀 환경에서는 직접 문서를 보고 따라해주시면 되겠습니다.
https://testing-library.com/docs/react-testing-library/setup
render, cleanup, screen
우선 가장 기본적인 RTL의 render, screen, cleanup 관련 내용입니다.
render : https://testing-library.com/docs/react-testing-library/api#render
function render(
  ui: React.ReactElement<any>,
  options?: { /* You won't often use this, expand below for docs on options */ }
): RenderResult
cleanup : https://testing-library.com/docs/react-testing-library/api#cleanup
render 메서드에 의해 마운트된 react dom tree를 unmount합니다. afterEach 메서드가 있는 테스팅 툴을 사용한다면 자동으로 cleanup이 트리거 되지만, 없는 경우 직접 구성해줘야 한답니다. 그냥 저는 어떤 테스팅 툴을 사용하던 간에 명시적으로 해주는 적어주는 것이 좋다고 생각됩니다. 만약 cleanup되지 않는다면 메모리 낭비일 것이고, 테스트 또한 '멱등'(어떤 조작을 몇 번을 반복해도 결과가 동일한 것)하지 않을 것입니다. 그러니까 cleanup 꼭 해주십쇼.
screen: https://testing-library.com/docs/queries/about#screendebug
생략.
어쨌든, 아래와 같이 구성한다면, 간단히 테스트할 준비는 마친 셈입니다.
import React from "react";
import { render, screen, cleanup } from "@testing-library/react";
import App from "./App";

// 테스트 케이스가 끝날때마다 기존에 가상의 화면에 남아있는 UI 를 정리합니다.
afterEach(cleanup)
describe('Header', () => {
  test('"How it works" link points to the correct page', () => {
    // 주어진 components를 렌더링합니다.
    render(<App />);
    // 렌더링 된 dom tree를 보여줍니다.
    screen.debug();
  })
})
Query! (get, query, find)
https://testing-library.com/docs/queries/about
dom을 render하고, cleanup할 수 있게 되었으며 screen.debug()로 확인할 수 있게 되었다면, 이제 렌더된 돔에 쿼리를 날려서 적절한 부분을 가져올 수 있습니다.
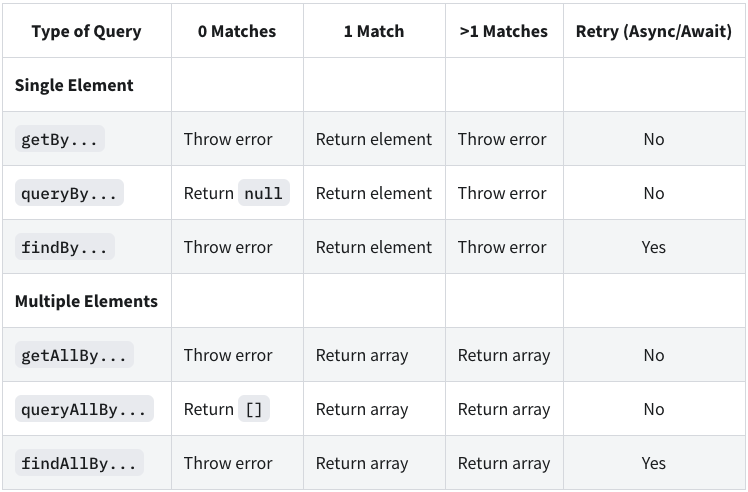
쿼리는 크게 아래와 같이 정리할 수 있습니다.
- getBy*, getAllBy* : 조건에 일치하는 dom 찾음. get의 경우 없으면 에러를 발생시킴.
- queryBy*, queryAllBy* : 쿼리 조건에 일치하는 dom 찾음. 없으면 null을 반환함.
- findBy*, findAllBy* : 조건에 일치하는 dom을 찾되, 기본적으로 1초를 기다려서 비동기적으로 렌더되는 dom도 잡아냅니다.
사실 getBy* + waitFor을 결합하여 findBy*꼴을 만들 수 있지만 굳이..
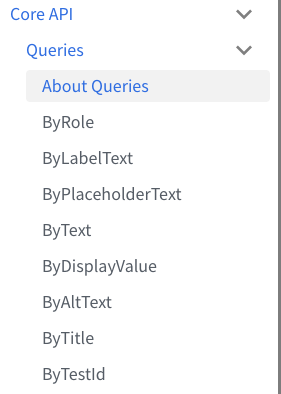
그리고 By*에 해당하는 ByTestId, ByText, ByRole 등등이 존재하는데 이 부분을 직접 문서를 보면서 익히시는 것이 제일 빠릅니다.
유일하게 조심해야할 점은, ByTestId는 최후의 선택이라는 것입니다. 테스트를 위해서 원본 코드를 수정해야하기 때문입니다.
(그런데 getByTestId도 많이들 쓰시더라구요... 애초에 query가 그렇게 많지 않습니다. ByText, ByRole 정도 해보고 안되면 ByTestId로)
<div data-testid="custom-element" />우선순위라고 문서에 추천하는 순서가 있긴 한데, 우선은 TestId만 좀 피해봅시다.
https://testing-library.com/docs/queries/about/#priority
그렇다면 실제로 작성해볼까요! 쌉쉬움 ㅎ
describe('Header',
  () => {
    test('"How it works" link points to the correct page',
      () => { render(<App />);
        // ARIA link role을 가진 컴포넌트 중 how it works 문자열이 있는 dom 찾음
        const link = screen.getByRole('link', { name: /how it works/i });

        // search 문자열을 child로 가지고 있는 dom
        const button = screen.getByText(/search/i);

        screen.debug(link)
        screen.debug(button);
     })}
 )
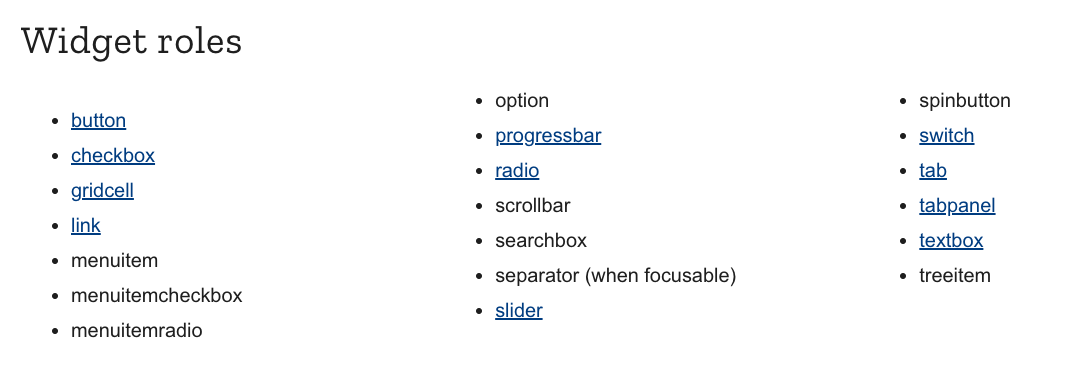
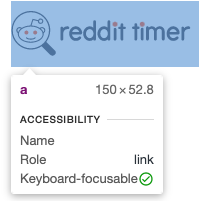
ByRole에 대해서는 html tag이름을 입력하는게 아니라 ARIA에 따른 role을 입력해야 합니다.
찾기 힘들죠? 개발자 도구에서 element 선택하면 Role을 살펴볼 수 있습니다.
Matcher와 user Event
dom을 가져오면 뭐합니까? 원하는 동작을 user Event로 트리거한 후 matcher를 통해서 체킹해봐야죠.
동작은 @testing-library/user-event를 사용하면 됩니다.
@testing-library/react에도 fireEvent 에 여러 이벤트 함수가 있긴 합니다만, user-event가 더 많은 이벤트와 옵션을 제공합니다.
또한 user-event에서는 focus 옵션이라던가 좀 더 자세하고 element의 특성에 맞는 행위를 fireEvent보다 더 잘해준다고 합니다.
한편 jest가 제공하는 matcher들, 그러니까 toBe, toEqual, toStrictEqual과 같은 것들은 DOM을 테스트할 수 없습니다.
따라서 testing library팀이 마련한 것이 jest-dom입니다.
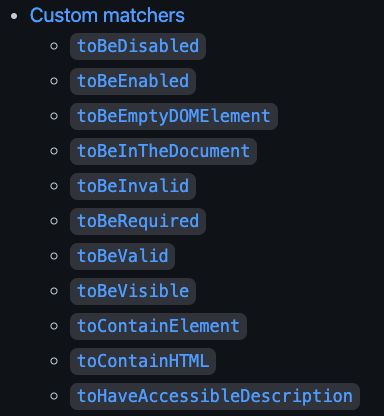
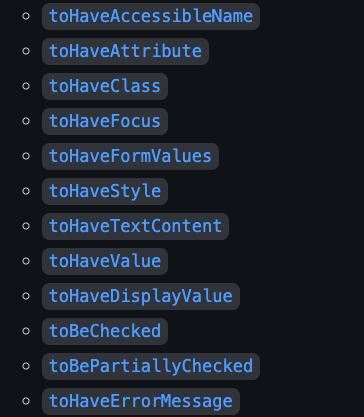
jest-dom이 제공하는 dom node matcher는 README에 정리되어 있습니다.
https://github.com/testing-library/jest-dom#table-of-contents
import React from "react"; import { render, screen, cleanup } from "@testing-library/react"; import App from "./App"; import { MemoryRouter } from "react-router-dom"; import userEvent from "@testing-library/user-event"; describe('Header', () => { test('"How it works" link points to the correct page', () => { render(<App />) const link = screen.getByRole('link', { name: /how it works/i }); // 클릭 userEvent.click(link) // 이동한 페이지에서 heading role을 가졌고, 문자열 how it works을 가지고 있는 컴포넌트가 도큐먼트에 있을 것으로 예상함. expect(screen.getByRole('heading', { name: /how it works/i })).toBeInTheDocument(); }) })
그래서 짠 코드를 좀 봐볼까?
import React from "react"; import { render, screen, cleanup } from "@testing-library/react"; import App from "./App"; import { MemoryRouter } from "react-router-dom"; import userEvent from "@testing-library/user-event"; afterEach(cleanup) describe('Header', () => { test('"How it works" link points to the correct page', () => { render( <MemoryRouter> <App /> </MemoryRouter> ) const link = screen.getByRole('link', { name: /how it works/i }); userEvent.click(link) expect(screen.getByRole('heading', { name: /how it works/i })).toBeInTheDocument(); }) test('logo click should show main page', () => { render( <MemoryRouter> <App /> </MemoryRouter> ) const logoLink = screen.getByRole('link', { name: /logo.svg/i }) userEvent.click(logoLink) expect(screen.getByRole('heading', { name: /Find the top posts on Reddit/i })).toBeInTheDocument(); }) })
ref
https://testing-library.com/
https://www.robinwieruch.de/react-testing-library
이 글 정말 RTL에 대해서 잘 정리가 되어 있더라구요. 덕분에 학습하는 시간을 많이 줄였고, 관련 코드도 여기에서 가져다 썼습니다.
https://jkettmann.com/beginners-guide-to-testing-react
ㄴ 번역
https://blog.rhostem.com/posts/2020-10-14-beginners-guide-to-testing-react-1
https://blog.rhostem.com/posts/2020-10-15-beginners-guide-to-testing-react-2
